Scissors. They seem so simple – yet for a young child, mastering them safely represents the convergence of strength, coordination, focus, and control. If you have ever watched a child struggle to cut along a line, grip scissors awkwardly, or become frustrated during a craft activity, you will know that scissor skills are far more complex than they appear. For parents, educators, and caregivers supporting children’s development, understanding how to approach promoting safe scissor skills step by step can make all the difference – not just for cutting paper, but for laying the groundwork for handwriting, self-care, and lifelong independence.
Why Do Scissor Skills Matter More Than You Might Think?
Scissor skills are a foundational fine motor milestone, but their significance extends well beyond craft time. When a child learns to use scissors safely and effectively, they are simultaneously developing visual-motor integration, bilateral coordination (the ability to use both hands together in a coordinated way), hand strength, and focused attention. These are the very same skills that underpin handwriting, buttoning clothing, using cutlery, and participating in sport and play.
Scissor use requires both hands to perform different tasks at the same time – one hand operates the scissors while the other holds, manoeuvres, and turns the paper. This division of roles strengthens each hand’s capacity for specialisation and supports neurological development across both hemispheres. In short, teaching a child to safely use scissors is teaching them to use their body and brain in a highly integrated, purposeful way.
For children who experience delays in fine motor development – including those living with developmental conditions, physical disabilities, or sensory processing differences – targeted support for scissor skills can be a meaningful part of their broader therapeutic journey.
When Do Children Typically Develop Scissor Skills?
Understanding developmental expectations helps caregivers gauge appropriate practice and identify when additional support may be beneficial. Scissor skills follow a clear, progressive sequence and are generally considered fully developed by around six years of age, though individual variation is entirely normal.
Age-Based Scissor Skill Milestones
| Approximate Age | Expected Scissor Skill |
|---|---|
| 1.5 – 2 years | Holds scissors with two hands; may snip at paper edge |
| 2 – 2.5 years | Opens and closes scissors with one hand; single snips |
| 2.5 – 3 years | Cuts across a sheet of paper; begins using the helper hand |
| 3 – 3.5 years | Cuts along a straight line (approximately 15 cm long) |
| 3.5 – 4 years | Cuts along curved lines; cuts simple shapes |
| 4 – 5 years | Cuts squares, circles, and more complex shapes with accuracy |
| 5 – 6 years | Cuts detailed shapes with multiple curves and angles |
| 6 – 7 years | Full scissor skill development; cuts a variety of shapes with precision |
Note: Developmental milestones are guides, not strict benchmarks. Individual variation is expected and normal.
Before scissor use begins, children need several foundational skills in place: good sitting balance and postural control, hand preference establishment (typically emerging around 2–2.5 years), adequate hand and wrist strength, eye-hand coordination, and the ability to sustain visual attention on a task.
What Pre-Scissor Activities Build the Right Foundation?
Promoting safe scissor skills step by step begins long before scissors are ever introduced. A range of purposeful play-based activities builds the hand strength, bilateral coordination, and fine motor precision that children need to succeed.
Building Hand Strength
Hand strengthening activities are essential preparation for scissor use. Playdough, clay, and plasticine offer excellent resistance training – children can roll, pinch, squeeze, and knead with their fingers, building the intrinsic hand muscles critical for scissor control. Other effective approaches include:
- Using kitchen tongs or clothespins to pick up and transfer small objects
- Squeezing spray bottles or therapy balls
- Opening and closing screw-top containers
- Popping bubble wrap or crumpling paper into balls using one hand
- Using hole punches to create confetti shapes for craft projects
Developing Bilateral Coordination
Because scissor use demands two hands working in concert, bilateral coordination activities are equally important. Tearing paper for collages, threading beads onto laces, simple weaving or sewing activities, and building with blocks like LEGO or Duplo all encourage both hands to work together in meaningful ways. Action songs such as “The Wheels on the Bus” or “Itsy Bitsy Spider” also develop bilateral rhythm and coordination in a playful, engaging way.
Fine Motor Precision
Finger isolation – the ability to move individual fingers independently – is another prerequisite for safe scissor use. Finger opposition drills (touching each fingertip to the thumb in sequence), sticker application and peeling, using tweezers or tongs for small objects, and threading activities all support this development.
How Should You Promote Safe Scissor Skills Step by Step?
Once foundational skills are in place, introducing scissors follows a clear, graduated progression. Safety is built into every stage – not as an afterthought, but as a core part of the process.
Choosing the Right Scissors
Child safety scissors with blunt, rounded tips are essential for young learners. Scissors should fit the child’s hand comfortably, be lightweight to reduce fatigue, and have non-slip handles. Left-handed children must always use left-handed scissors – using right-handed scissors forces an unnatural wrist position that undermines both safety and skill development. Spring-loaded or self-opening scissors can be particularly supportive for children who are still building hand strength.
Teaching Correct Grip and Positioning
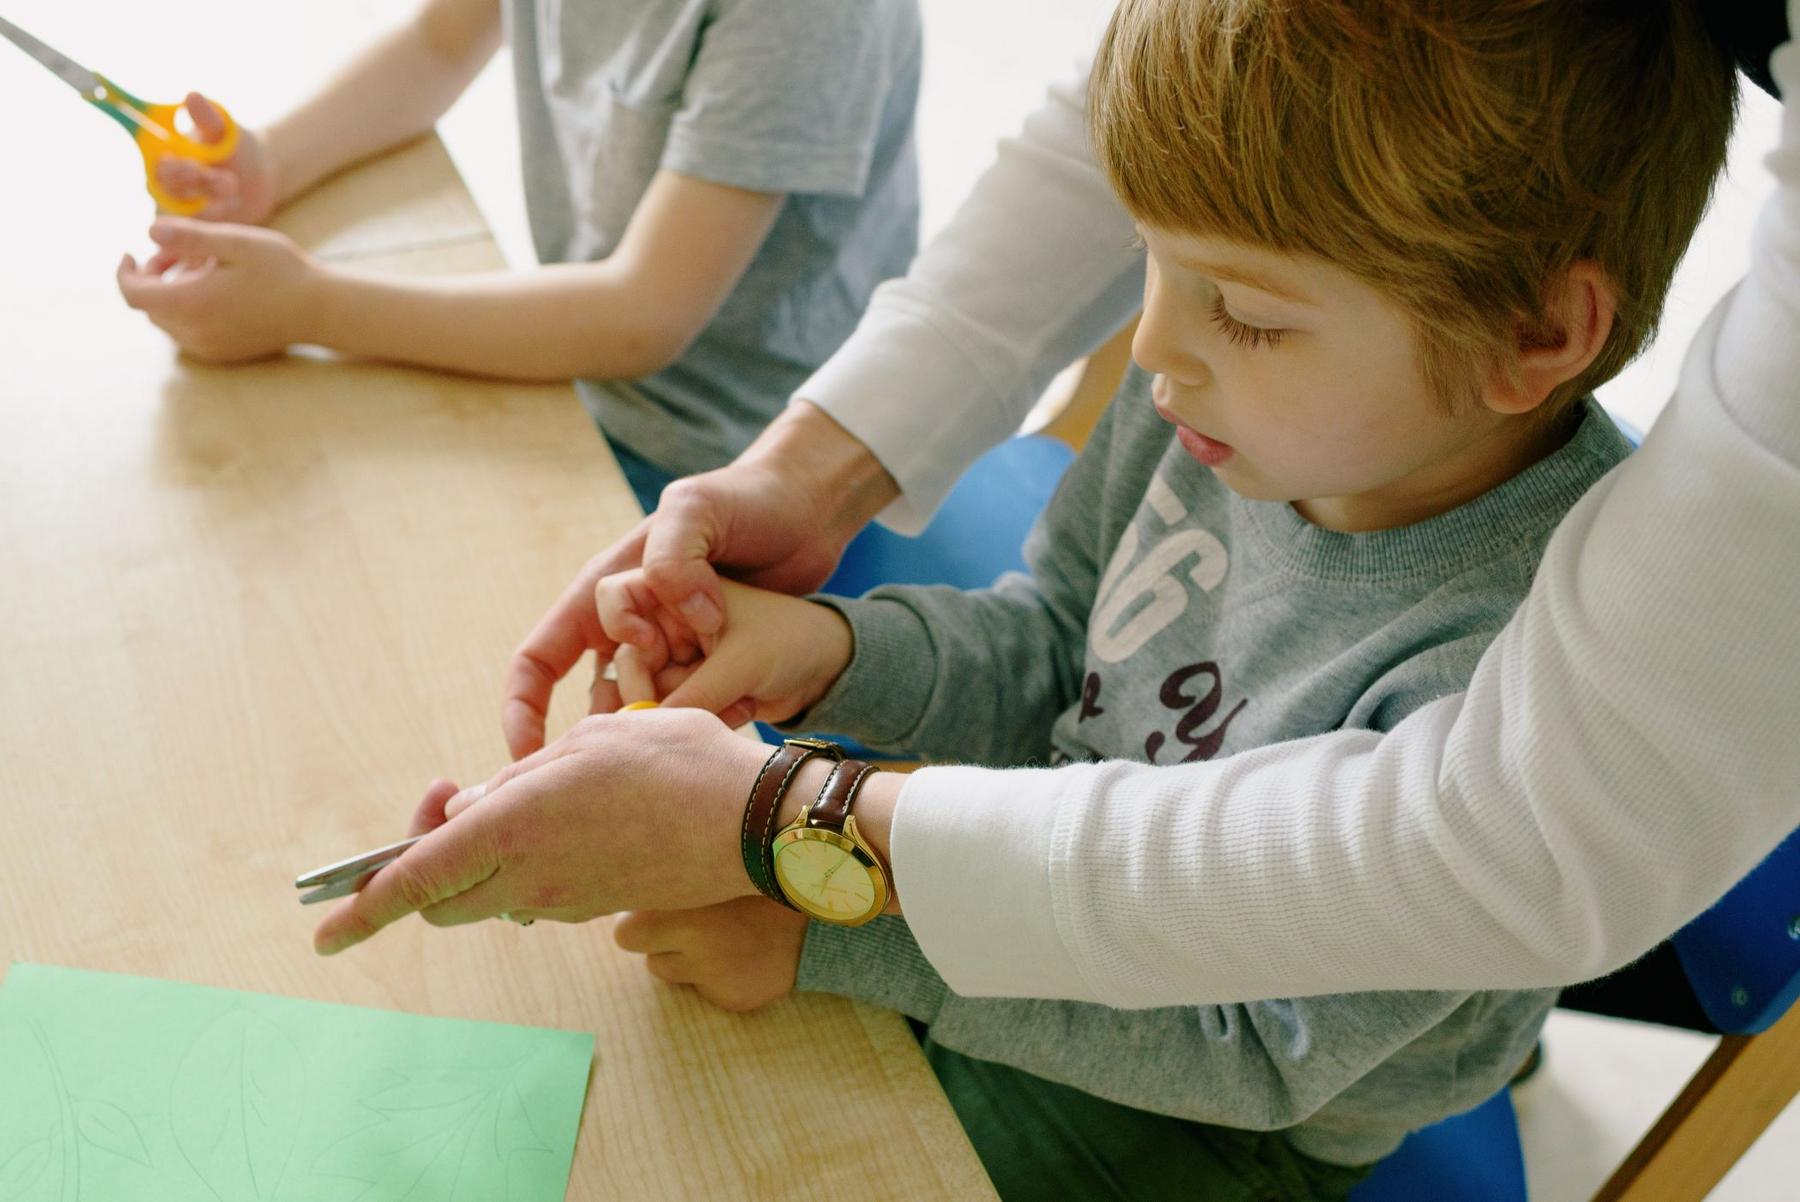
The correct scissor grasp – sometimes called the “thumbs up” or “Spiderman” grasp – is fundamental. The thumb goes through the smaller loop and must always point upward. The middle finger goes through the larger loop, and the index finger rests in front to stabilise and guide. Elbows should remain close to the body (not raised or flapping outward), and the child should be seated with feet flat on the floor and elbows at approximately a 90-degree angle to the table.
The non-dominant hand must hold the paper with both thumbs pointing upward, turning and adjusting the paper as needed – the scissors move forward, not across the body.
The Step-by-Step Cutting Progression
Stage 1: Scissors Without Paper
Begin by letting children practise holding scissors and opening and closing them in the air. Use cues like “crocodile mouth opening and closing” to make this engaging. Establish safety rules from the very first session: always sit when cutting, scissors move away from the body, and scissors are only for approved materials.
Stage 2: Single Snips
Introduce easy-to-cut materials that require only one closing motion – plastic drinking straws, playdough rolled into logs, narrow strips of cardstock, or yarn. Each snip should be one clean closure of the scissors. Keep sessions short (five to ten minutes) and celebrate each successful cut.
Stage 3: Straight Line Cutting
Progress to continuous cutting along bold, thick lines on firm paper such as cardstock. Start with short lines (five to eight cm) and gradually extend length over multiple sessions. Cues such as “thumbs up” and “glide like an ice skater” help children develop smoother, more controlled movements. Tape the paper to the table initially to reduce the demand on the non-dominant hand.
Stage 4: Curves and Circles
Introduce gentle curves, then wider arcs, full circles, and eventually spirals. The key teaching point at this stage is that the paper-holding hand turns and adjusts the paper while the cutting hand remains relatively stable.
Stage 5: Simple Shapes
Combine straight lines and curves to cut squares, rectangles, triangles, and simple figures. Use large, clearly drawn templates initially, then progress to smaller and more detailed shapes.
Stage 6: Complex Shapes
Stars, animals, people, and detailed craft shapes represent the final stage of scissor skill progression, typically achieved between five and seven years of age.
What Are the Most Common Scissor Skill Challenges and How Can You Address Them?
Even with the best preparation, challenges are common and entirely expected. Understanding the likely cause helps caregivers respond constructively.
Tired hands or raised elbows often indicate insufficient hand strength. Continue pre-scissor strengthening activities, shorten cutting sessions, and consider spring-loaded scissors to reduce effort. Consistent reminders to “keep elbows in” support better positioning.
Choppy, jagged cutting typically reflects a too-rapid or inconsistent motion. Slowing the pace and using cues like “glide like an ice skater” encourages smoother movement. Regular practice naturally improves fluency over time.
Difficulty staying on the line may relate to visual-motor integration or bilateral coordination. Use thicker, more visible lines, shorten the line length, and tape the paper down for stability. High-contrast colours (such as black lines on white paper) can help significantly.
Mouth movements while cutting are a common sign of overflow motor activity in younger children – a normal part of fine motor development. Gentle, consistent reminders usually help, and this typically resolves with continued practice.
Incorrect scissor orientation can be addressed using simple analogies: the blades are the crocodile’s mouth, and the thumb always goes in the small hole, pointing up. Consistent cueing and repetition build this habit reliably.
When Should You Consider an Occupational Therapy Assessment for Scissor Skills?
While variation in scissor skill development is entirely normal, there are circumstances where a professional assessment may be beneficial. If a child aged five to six years is experiencing significant difficulty with scissor grip despite regular practice, cannot snip or cut with any consistency, shows severe hand fatigue during short cutting periods, or demonstrates associated difficulties with other fine motor skills such as handwriting or self-care, an occupational therapy assessment can provide valuable clarity.
Occupational therapists use systematic, evidence-informed approaches to assess fine motor strength, bilateral coordination, visual-motor integration, and functional impact. They can develop a tailored intervention plan, recommend appropriate adaptive equipment, and coach caregivers in supporting skill development at home. For NDIS participants, occupational therapy services related to fine motor development may be funded under the Capacity Building – Improved Daily Living support category.
From Snipping to Soaring: Building Confidence Through Safe Scissor Practice
Promoting safe scissor skills step by step is not simply about cutting paper – it is about equipping children with the physical and cognitive building blocks they need for school readiness, independence, and confident participation in daily life. By following a structured developmental progression, prioritising safety from the very first session, and supporting foundational skills through purposeful play, caregivers and educators can make a lasting difference in a child’s fine motor journey.
When challenges arise – and they often do – knowing how to respond calmly and consistently, and recognising when additional support may be helpful, ensures that every child has the opportunity to develop these skills at their own pace, with the right guidance behind them.
Have questions? Need help? Contact Astrad Occupational Therapy for more information on how to support your child’s development.
At what age should I introduce scissors to my child?
Children can typically begin exploring scissors with adult supervision from around 2–2.5 years of age, starting with child safety scissors and simple snipping activities. However, readiness also depends on the development of prerequisite skills such as hand strength, hand preference, and the ability to sit stably. If you are unsure whether your child is ready, an occupational therapy assessment can provide helpful guidance.
What type of scissors are safest for young children learning to cut?
Child safety scissors with blunt, rounded tips are recommended for all young learners. They should be lightweight, appropriately sized for the child’s hand, and have non-slip handles. Left-handed children must use left-handed scissors specifically designed for them. Spring-loaded scissors may be beneficial for children still developing hand strength.
How often should my child practise scissor cutting?
Regular practice of two to three times per week is generally more effective than infrequent, lengthy sessions. Each session for young learners should typically last around ten to fifteen minutes to avoid fatigue and maintain engagement. Short, positive, and consistent practice sessions tend to produce the best developmental outcomes.
How do I know if my child needs occupational therapy support for scissor skills?
Consider seeking an occupational therapy assessment if your child is approaching school age (five to six years) and continues to experience significant difficulty with basic scissor tasks, shows persistent hand fatigue, or has challenges with other fine motor activities such as handwriting or self-care tasks. An occupational therapist can assess the underlying factors and provide targeted, individualised support.
Can children access NDIS funding for occupational therapy to support scissor skills?
Yes. For eligible NDIS participants, occupational therapy services that address fine motor skill development – including scissor skills – may be funded under the Capacity Building – Improved Daily Living support category. Children may also access supports through the NDIS Early Childhood Approach. Speaking with an occupational therapist or your NDIS planner can help clarify funding options relevant to your child’s situation.